Looking for telling time activities and games?!
It can be a challenging task, but oh how FUN it is teaching students how to tell time! I really don’t think there’s anything more enjoyable than seeing a child learn such valuable life skills. I have one important phrase I’d like you to keep in mind when teaching a life skill such as telling time: “Learning by doing.”
Creating ample opportunities for your students to learn by using hands-on activities will not only help them catch on quickly but make learning fun and motivating!
There are so many concepts in life that follow the “learning by doing” theory. How did you learn to ride a bike? Tie a shoe? Drive a car? I’m going to guess it wasn’t by listening to someone tell you how to do it. 😉
You learned by doing it!
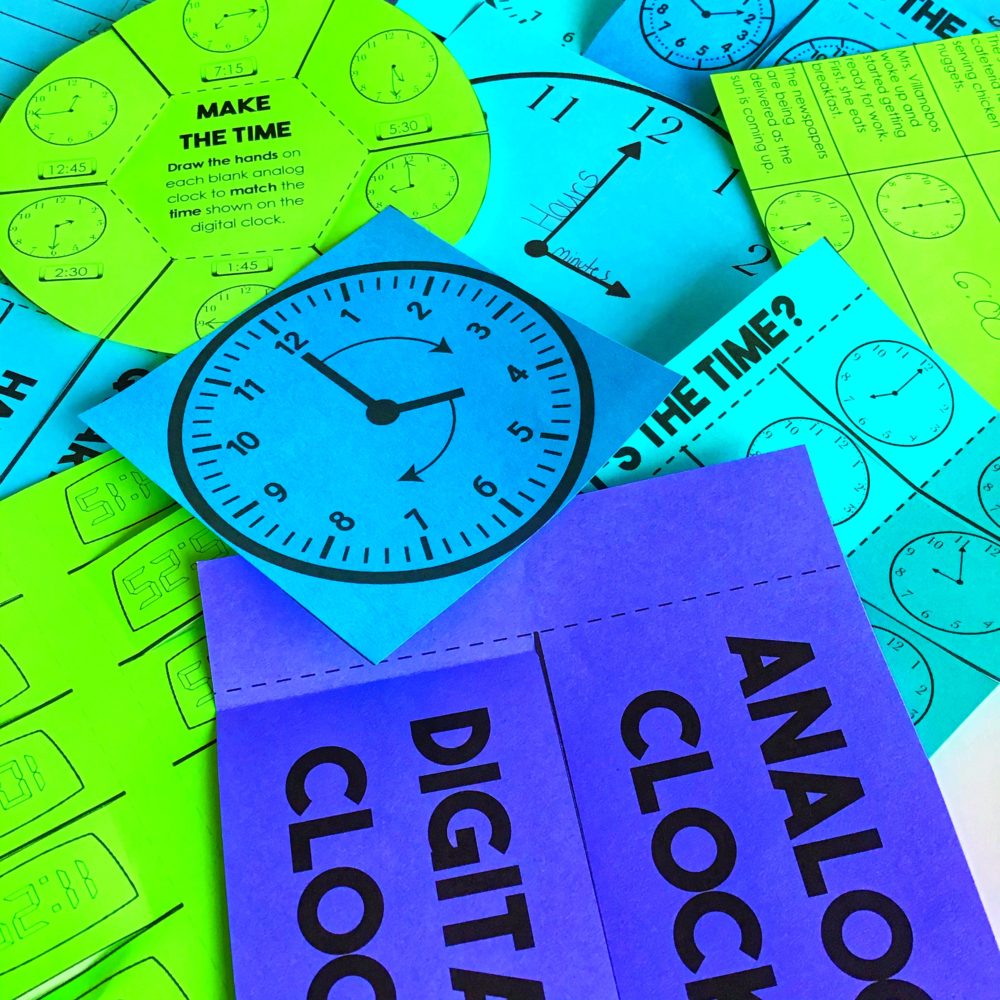
I have a few resources, games, and even a craft idea that I’d love to share with you to make telling time fun, engaging, and will allow your entire classroom to learn by doing!
It’s important to start with the basics to get your students warmed up to the idea and allow them to make some connections before getting into the nitty gritty of telling time.
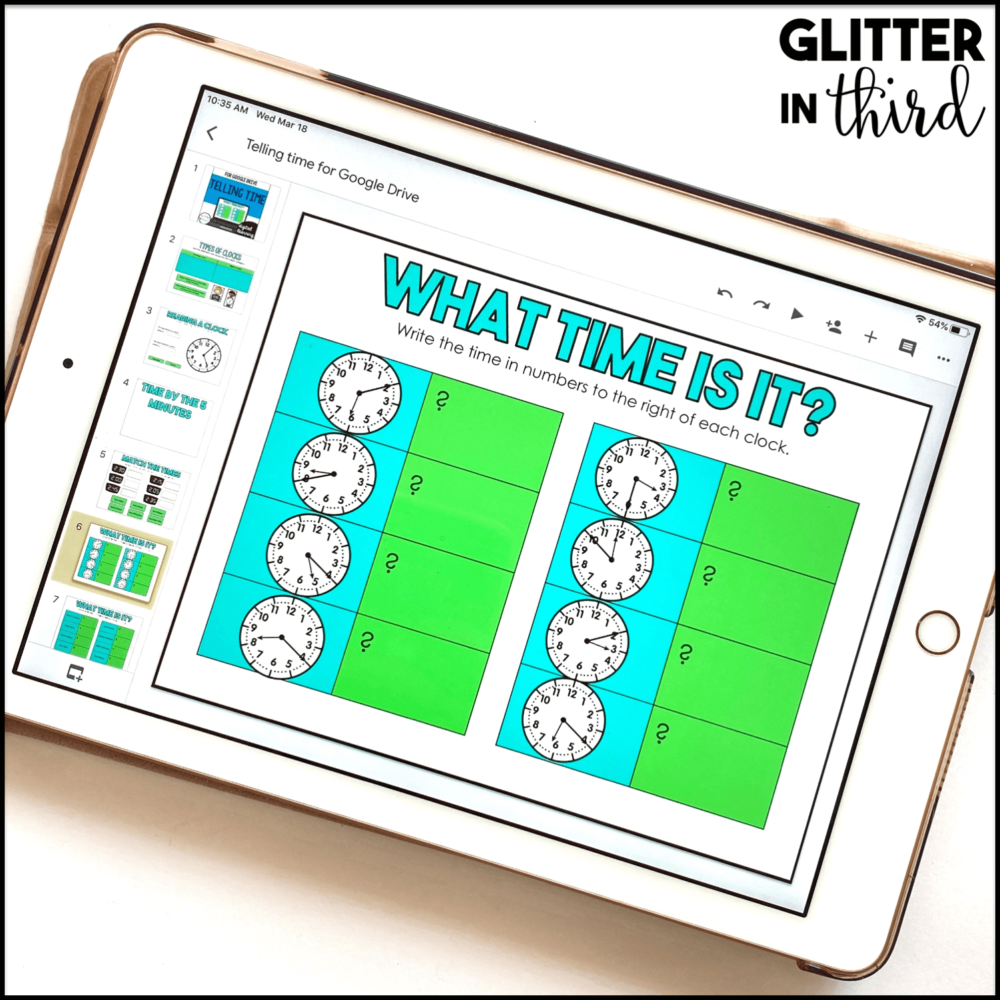
I’m super excited to share this Google Classroom Telling Time resource because it not only covers the basics and gets students familiar with time but includes activities for telling time down to the minute!
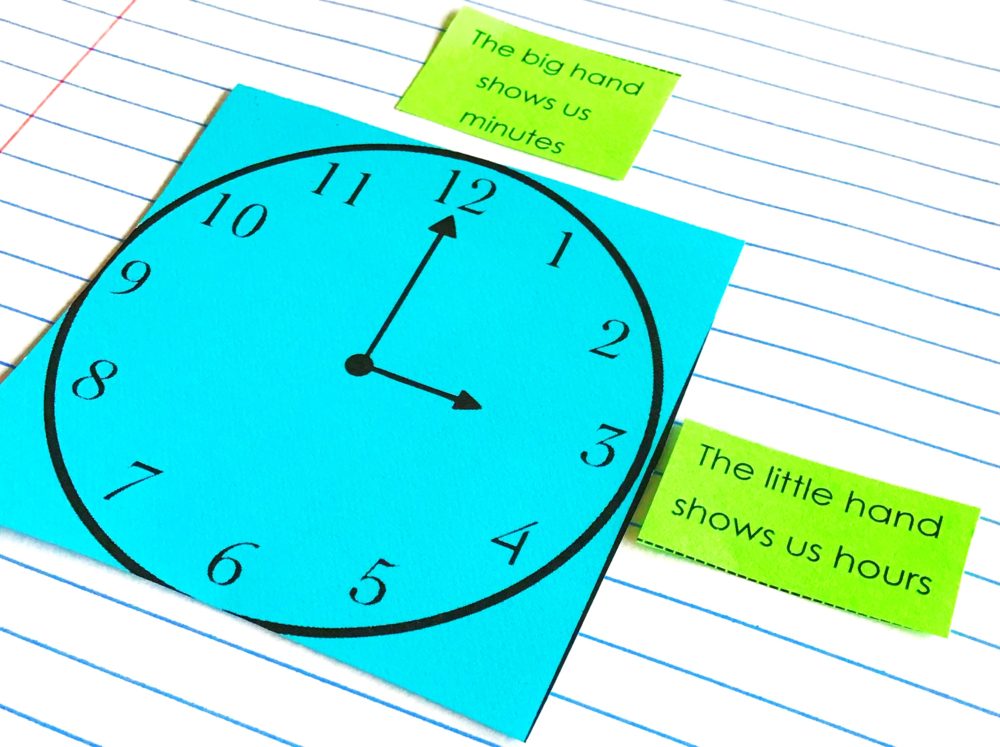
Included are AM/PM scenarios that your students will decide when the scenario takes place, as well as learning about time expressions such as quarter ‘til, quarter after, half past, five ‘til, and five after. There are also drag-and-drop activities that focus on matching vocabulary, written times with digital times, and identifying the big hand and little hand on the clock.
I also love that this resource slowly builds students’ learning by moving on to creating their own answers in Google Slides! The student is given a digital time, and then uses the given features in Google Slides to create that time on an analog clock by drawing in where they believe the hour and minute hands go.
Check out this Google Classroom resource here!
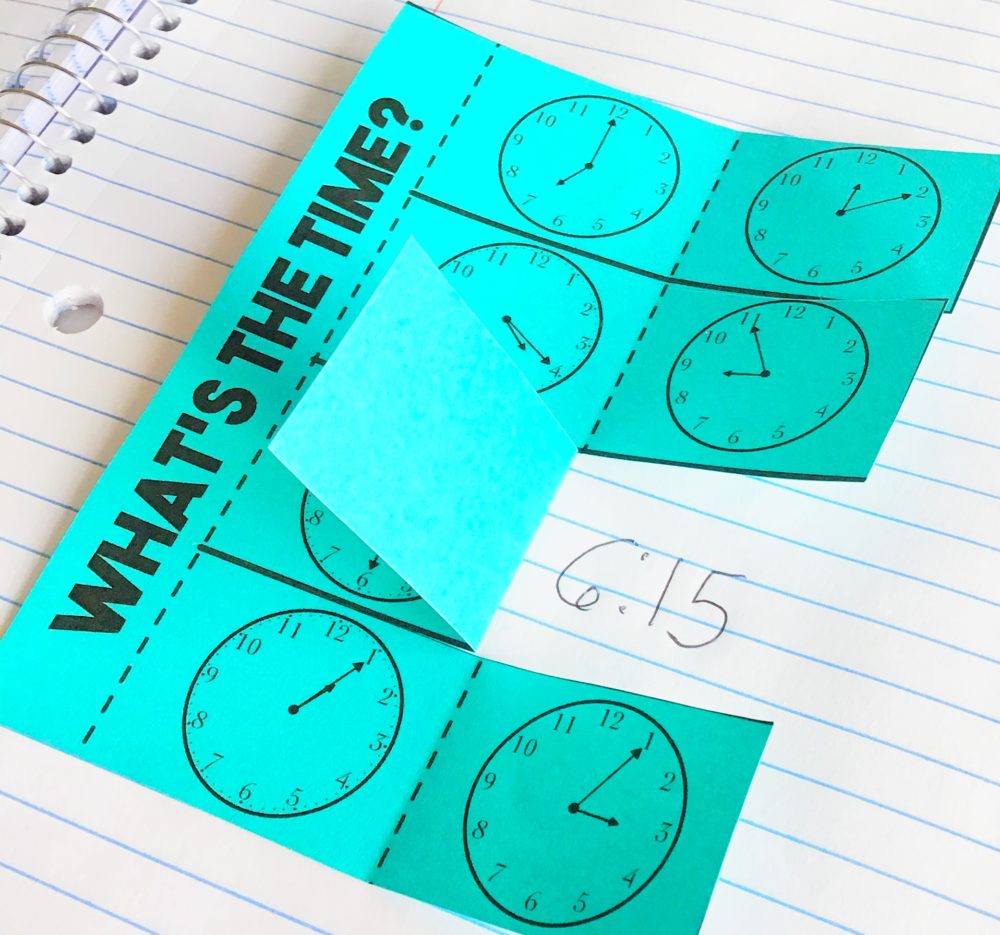
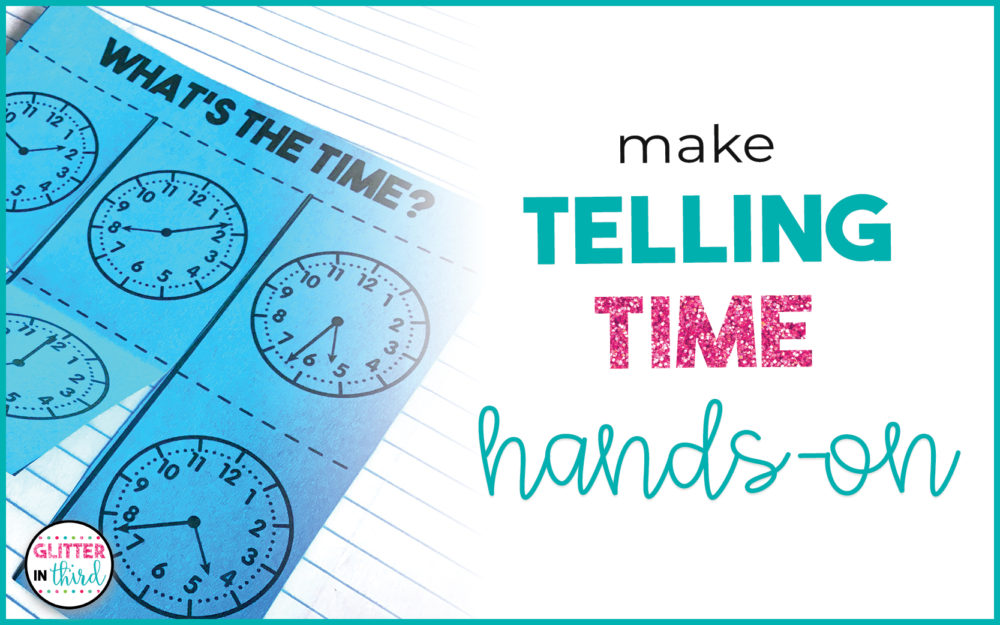
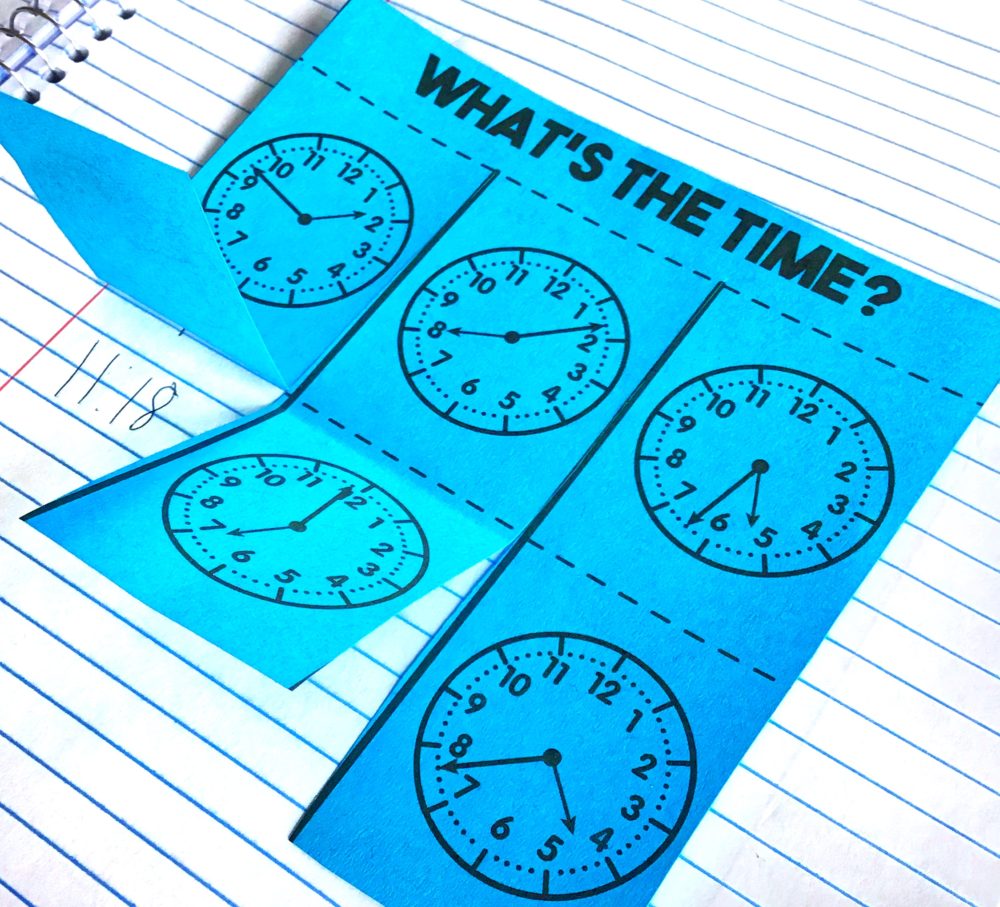
This interactive notebook is packed with charts, diagrams, flipbook sorts and activities, and a circle foldover. The best part is that it’s differentiated and comes with three different formats to fit the needs of every learner in your classroom.
There are so many areas of telling time that are included: Which way a clock moves, the time of each number, reading digital times and drawing the hands on an analog clock, working with increments of time by 5 minutes or by 1 minute, and identifying whether it’s AM or PM (and that’s just to name a few!).
Don’t forget you can convert this paper interactive notebook into a PDF if you’d like your students to learn by doing on a device! 🙂
I’m pretty sure no matter what concept you’re teaching, Bingo can be used for literally any lesson!
Bingo makes learning so fun and it’s an awesome way to create a visual for students! You can create your own Bingo cards from lots of free online generators.
You can try several different forms of time-telling Bingo by creating cards with all digital times, analog times, or even time expressions such as half past, quarter past, etc. or incorporate all the forms into one game! There are so many options and the excitement of the game keeps the students engaged.
Has anyone had a lesson go better simply because you were outdoors? Because, same. 😉
Grab some chalk, a jump rope, hula hoop, yarn, or literally anything in your classroom that you can make a clock out of and head outside! Every student can draw on the sidewalk or position their manipulatives to represent the time that you call out.
For example, if using chalk, have the students draw the hour and minute hands on the inside of their jump rope that they positioned in a circle. Grab some pipe cleaners and have them create different sized hands for their clocks. Or, let the kids go find small rocks, sticks, or leaves that can also serve as hour or minute hands. The more creative and less restricted they feel, the more they will enjoy learning to tell time!
This is an oldie-but-goodie! You can read more about it in my blog post here!
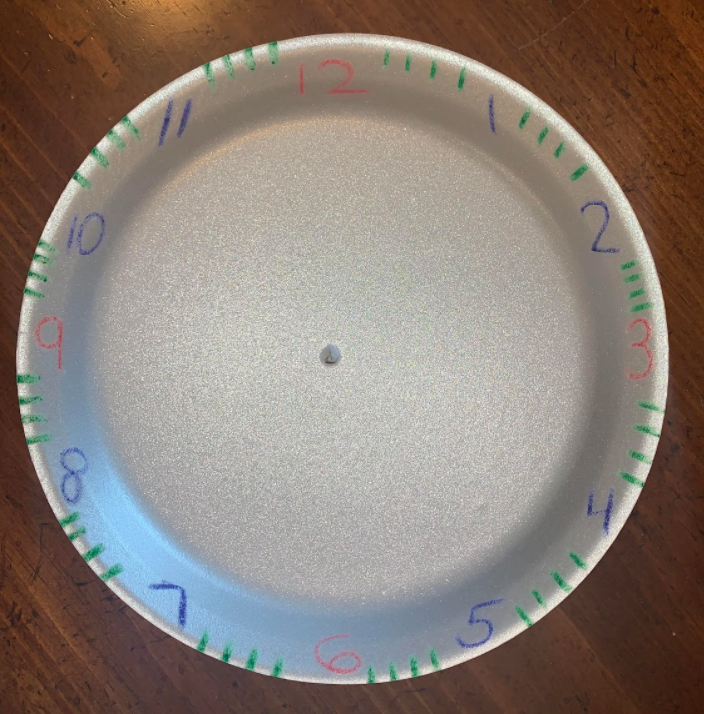
This activity is super fun if you’re looking to incorporate a craft into your lesson or if your students are needing a little creative time.
Each student will be given a paper plate and 2 pipe cleaners (I don’t recommend using markers if you have styrofoam plates – super messy!).
I do recommend the 2 pipe cleaners be different colors (it’s easier for them to tell the difference between the hour and minute hand!).
The bottom of the plate is going to serve as the front of their clock. Each student is going to need to poke a hole directly through the center of the plate and make it big enough that a pipe cleaner can fit through.
*Tip – Using the tip of a pencil to poke the hole is about the perfect size. You don’t want it too big, so that way the pipe cleaners will be snug!
They can decorate the flat area of the plate however they’d like, but leave the area around the outside edge blank from design.
This is where they will write their numbers and color coordinate certain times. I would recommend writing the numbers on the clock all together at the same time.
Decide which colors will represent different times. For example, you could write the 12, 3, 6, and 9 in red to show quarters, and then 1, 2, 4, 5, 7, 8, 10, and 11 in blue to show increments of 5. If you’d like, you can make tiny tick marks in between numbers in another color to better represent time increments of a minute. There are tons of options to best fit your learners. 🙂
Lastly, once their clocks are decorated and your numbers are written, place the ends of both pipe cleaners through the whole in the plate, and then flatten out the pipe cleaners so that they lay on the plate and aren’t standing straight up.
They’ll want to string the pipe cleaners through about 2-3 inches so that they stay in place, but can move in a clockwise formation nicely.
Your students now have their own clocks to practice telling time with!
These are so fun to use when you have an extra 5 minutes before transitioning to your next lesson and need a quick activity that allows for extra practice time! The personalized designs on the clock make it a little more fun, too!
I hope your students find these telling time resources, games, and activities enjoyable and make telling time all the more bearable for them and you. 🙂 Just remember, you can never go wrong when you’re “learning by doing!”